Even better, they tweeted it!
 Screen capture, UX Collective’s tweet.
See the article on UX Collective (or here).
Even better, they tweeted it!
Screen capture, UX Collective’s tweet.
See the article on UX Collective (or here).
…The diagram which is to affect thro’ the Eyes what we fail to convey to the public through their word-proof ears.
— Florence Nightingale
Cross-posted from my Medium blog.
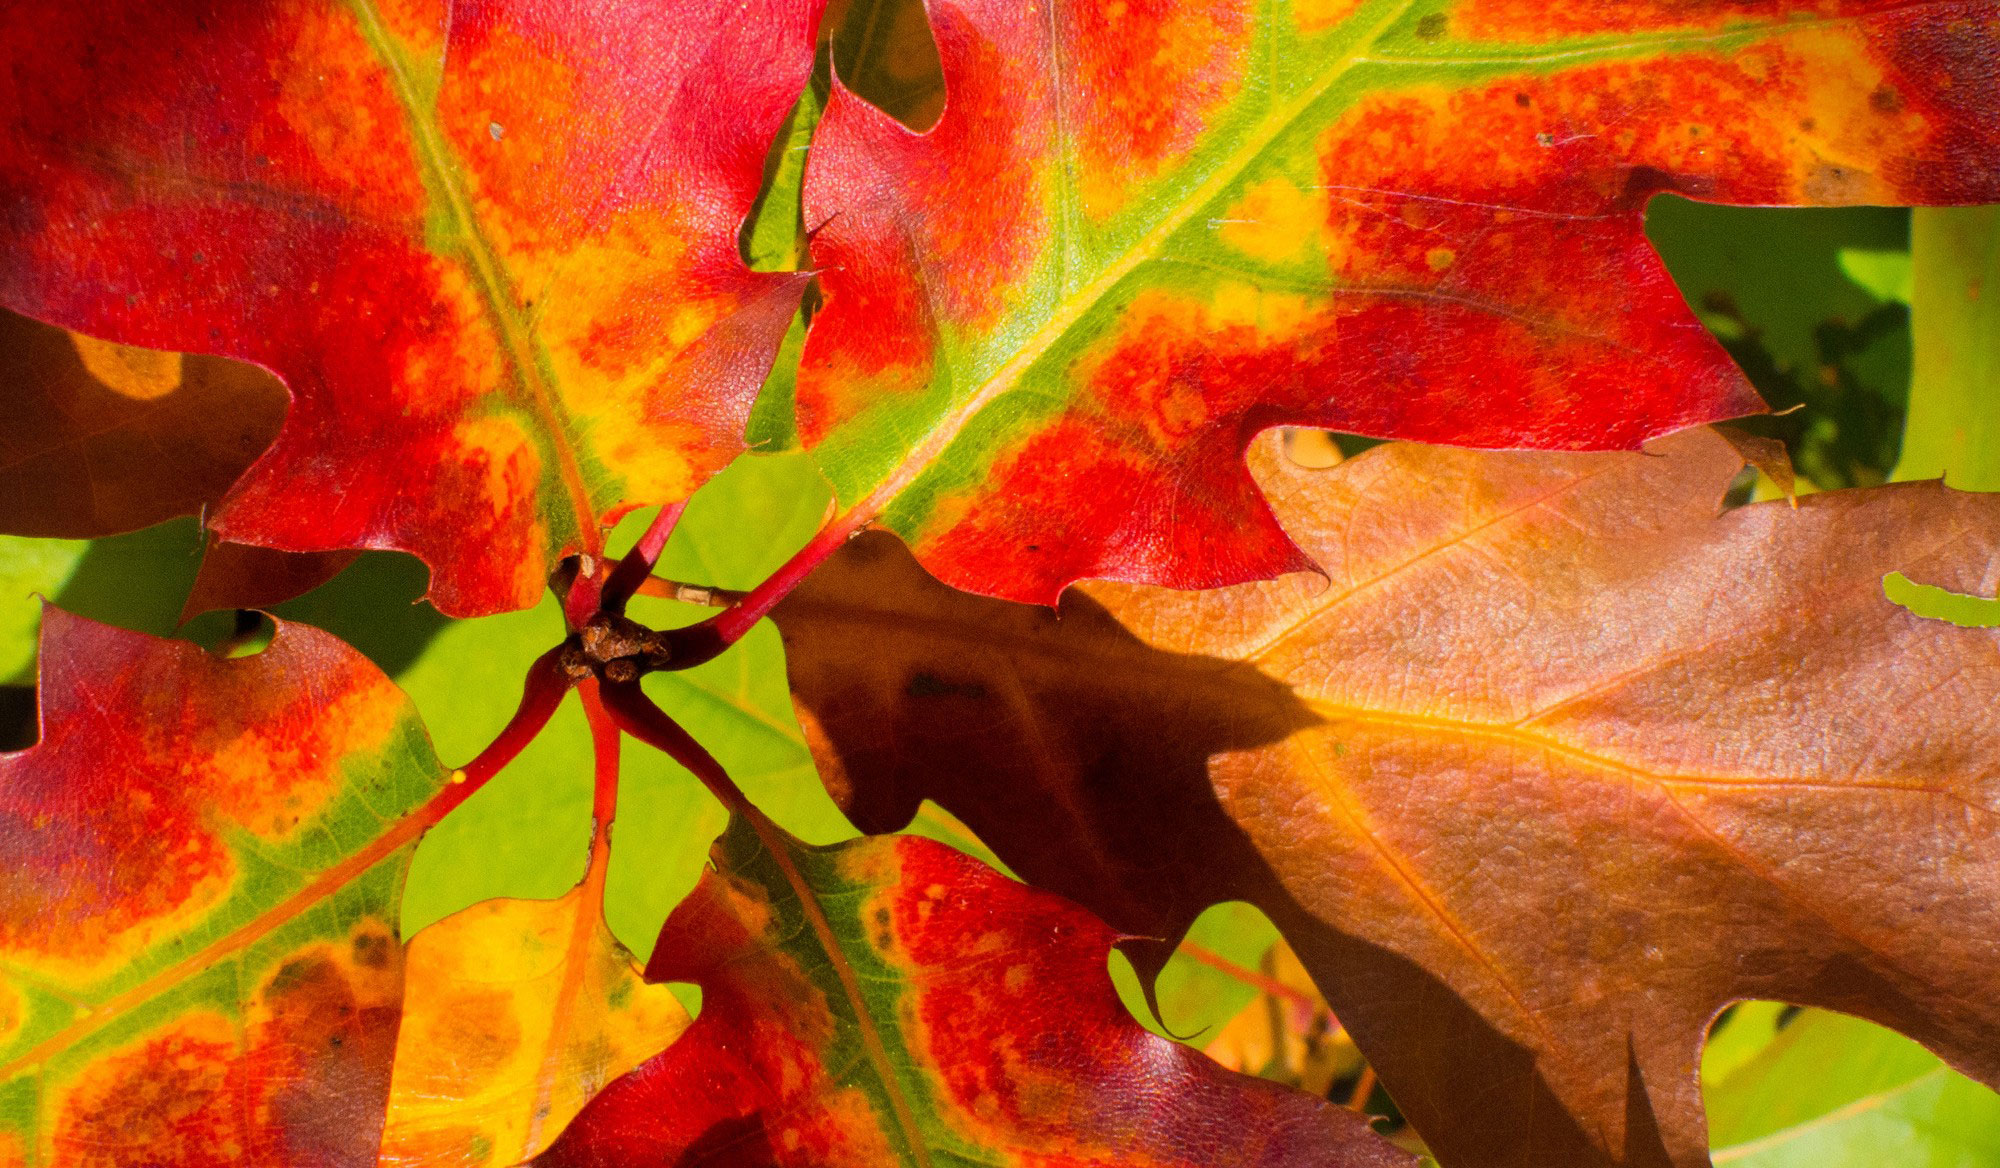
Autumn leaves showing off a glorious red/yellow/green palette. Photo by enneafive of Flickr, under Creative Commons by 4.0 license. Links below.
Everyone uses them: Green, yellow (or orange), and red. We use them in data visualization, we use them in buttons, we color text and icons with them and put them into alerts. They are often used in crucial moments, when we are announcing success, or breaking bad news. We abuse them, too, using them to draw attention where they aren’t relevant. What we don’t do, far too often, is make them accessible.
A significant minority of people are color blind, and most of those have red-green color blindness. Since 2011 I’ve had to solve for color accessibility in important interactions, such as alerts for patient vitals, quality of patient care, cloud server status, or executive sales analytics. Here are some accessibility tips I’ve picked up along the way, as well as my personal template for a usable, accessible traffic color palette.
Love data visualization? Love pies? So do I.
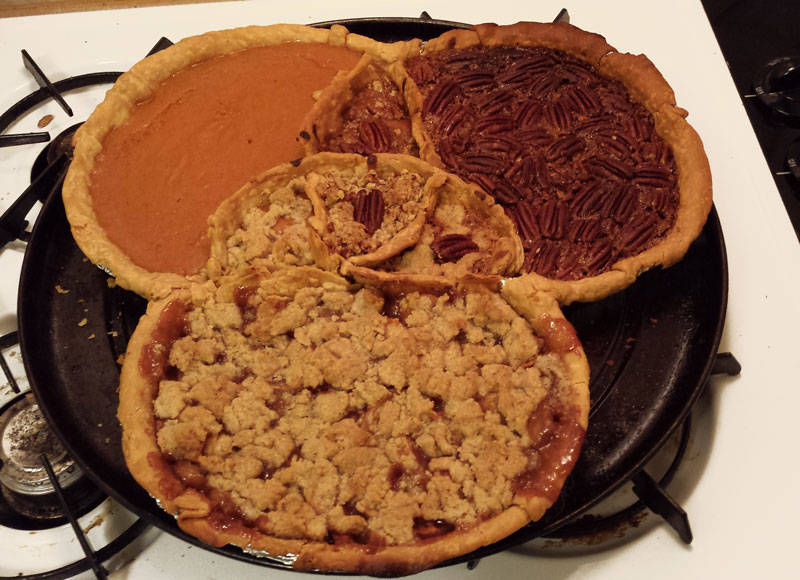 Pumpkin + pecan + apple pie crumble = Venn pie-agram
Last Tuesday we had a Thanksgiving potluck at work, and at the instigation of a coworker I made a Venn diagram pie. Here’s how I did it, if you want to try it yourself.
You can use whatever flavors you want, but remember they have to combine into a pleasing flavor profile. The flavors of the three ingredients I used were pumpkin, pecan, and apple crumble.
The recipes were fairly straightforward. Since the undertaking was complex I went simple with the recipes. For pumpkin and pecan filling I adapted About.com’s Southern Food Classic Pumpkin Pecan Pie recipe. For the pumpkin filling I bumped up the ginger and added nutmeg. For the pecan filling I used dark corn syrup, replacing about 1/3 of the dark syrup with maple syrup and a little molasses.
For the apple pie I used Cortland, Gala, and Honey Crisp apples. (I recommend The Apple Works for good information on what apples work best in what contexts.) Once again the About.com Southern Food section provided a good Apple Crumble Pie recipe.
I’d never used it before, but Pillsbury’s rolled up pie crust did pretty well!
So, to make this happen you need the following:
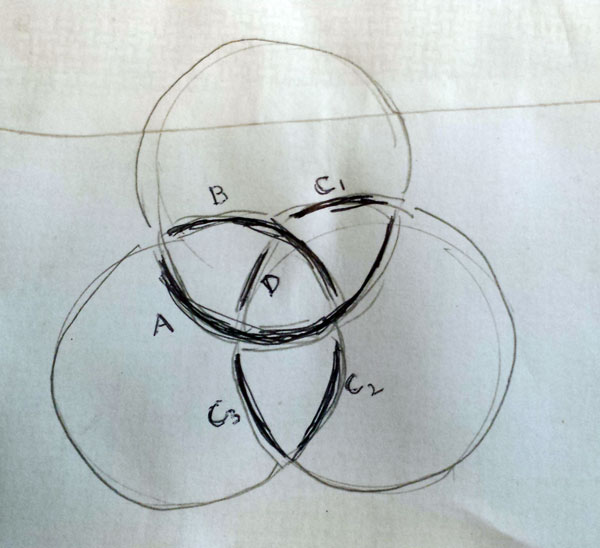
Here’s how the three pans overlapped. Note how corners are folded over. I used an ancient pizza pan for support instead of a cookie sheet (most cookie sheets don’t fit in our tiny oven).
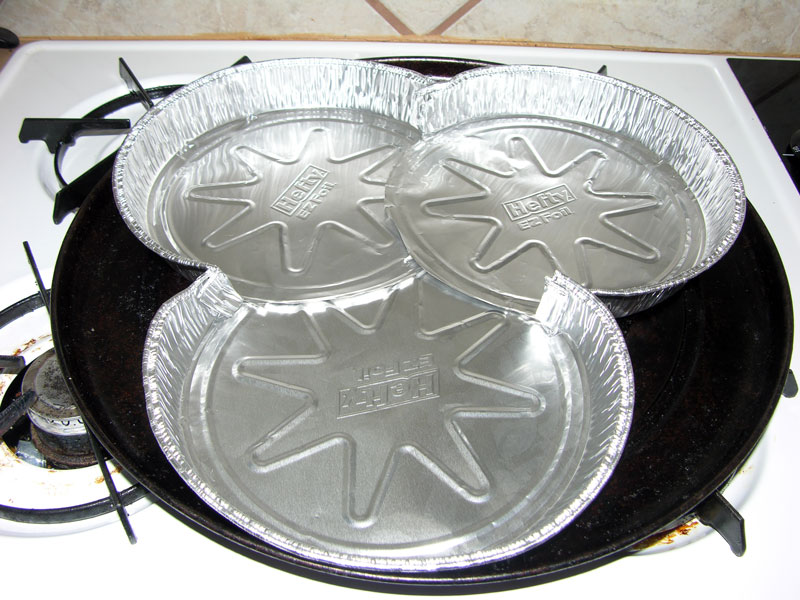 Making the superset framework for a Venn pie-agram.
A detail from the bottom. Cut your flattened sides into sections so they lie flat and don’t warp your pan.
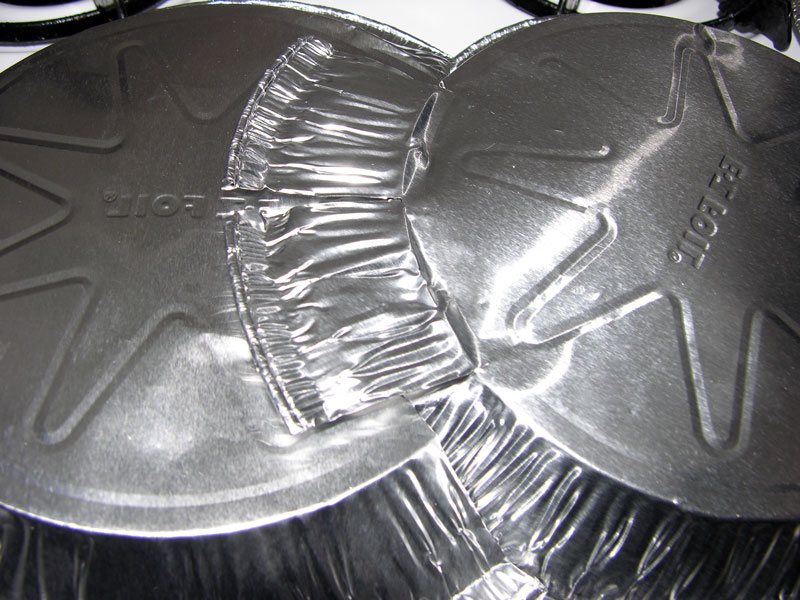 Detail, cut and overlapping sides.
Line your completed pan with aluminum foil to cover the sharp edges you’ve cut and prevent leaks.
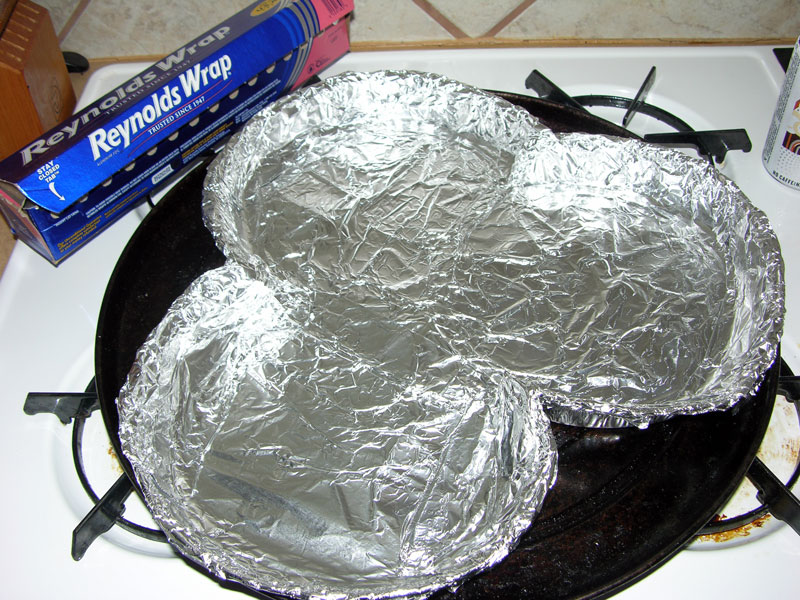 Any experience with tin foil hats helps in this step.
Preheat your oven to 350°.
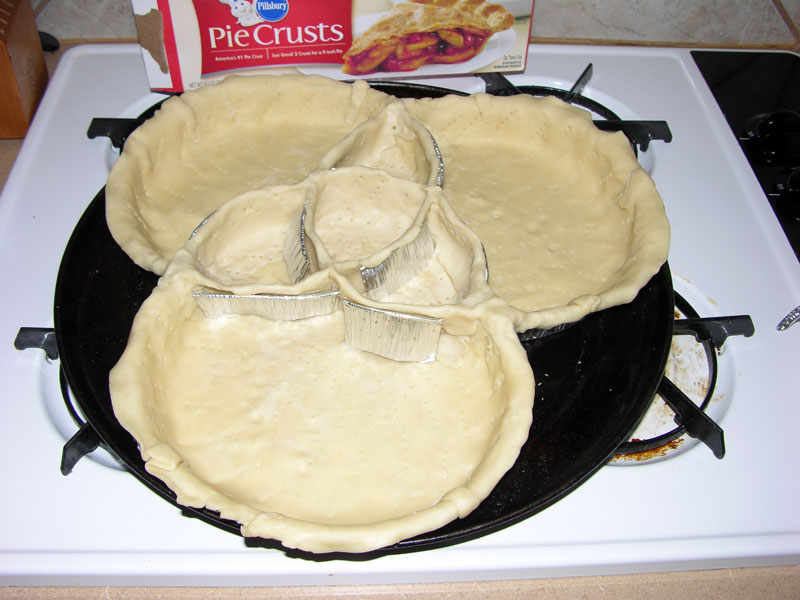
Unroll your pie crust and lay it out. Cut away excess and press edges together so you have a continuous bottom that isn’t too thick.
 Keep your excess pie dough!
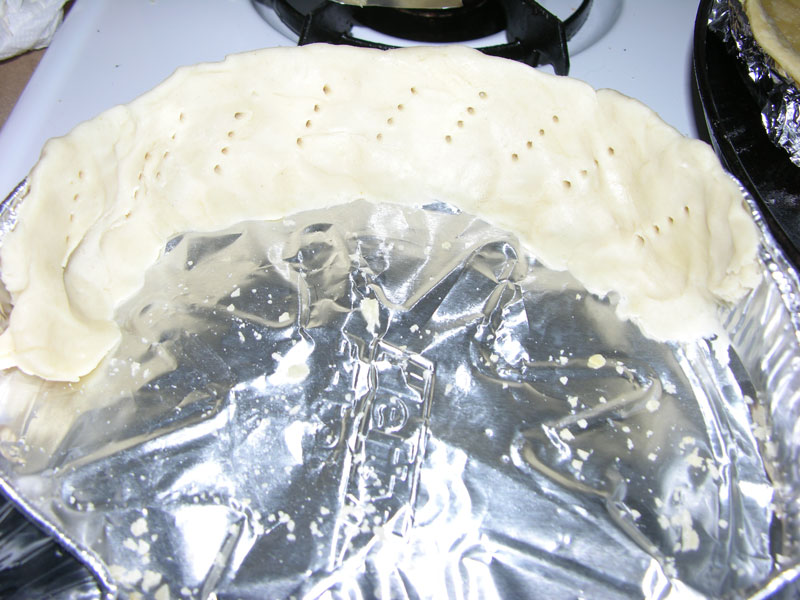
The image below, with raw dough and supporting aluminum, does not work. The crust melts and doesn’t hold its shape. Thin metal dividers also do not work: they leak abominably. I learned this making my first “pie chart” pie; metal dividers were much more trouble than the crust below (for one thing, I had to tilt the pie in the oven until the pecan filling set).
 Little metal dividers not only leak, but the necessity of removing them before eating would ruin the pie.
Partially bake your pie crust edges and bottom about 10 minutes at 350°. Also bake sections for the middle crust, separately (see below). Note that the middle crust has a slightly tighter curve, to make the overlapping areas slightly egg-shaped instead of pure circles. This will give you more space in the middle sections. Don’t forget to puncture the crust with a fork to avoid bubbles!
Important: reserve extra unbaked pie crust. You’ll need it to make the middle section work properly.
 This piece will form part of the crust defining the overlapping sets in our Venn pie-agram.
These are the crust pieces you’ll need to shape the middle of your Venn pie-agram. I used six crust lengths: one long curve, one not-so-long, three short ones, and one tiny one.
Super-sophisticated Venn pie-agram wire frame.
To make the crust stay in place and reduce leaks, use unbaked dough to hold the partly-baked middle sections in place. It doesn’t need to be perfect. Tip: Use a bread knife to gently saw the pie crust sections. Pie crust is crumbly. Try to make them line up naturally with the outside edge.
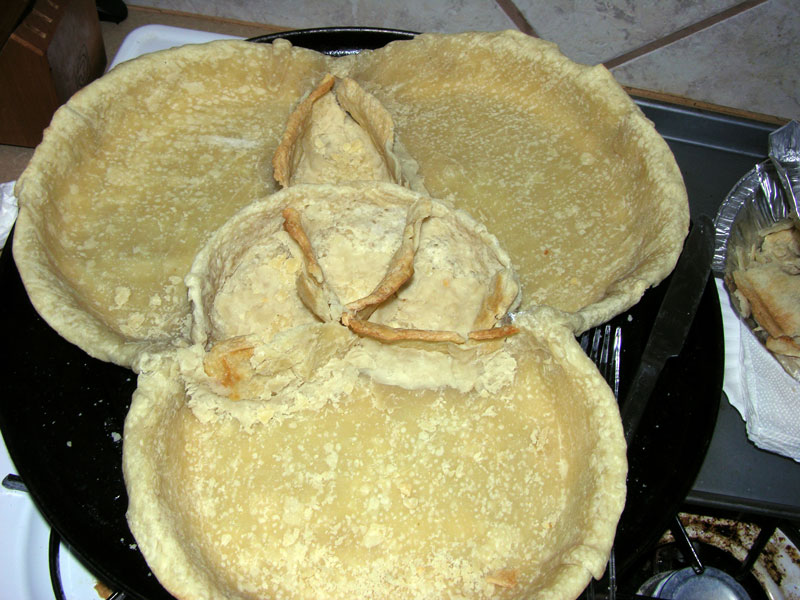 This is what your middle should look like. It’s not perfect circles, but trust me, you’ll prefer this when creating your overlapping fillings.
Tip: Start with the firmest filling first. It will fill up any weak spots a more liquid filling might break through, keeping your sections more compartmentalized. Here, the apple pie section has been filled and covered with crumble; apple has been layered in the bottom of its three overlapping sections in the middle. To the right, pumpkin filling (my next step). The pecan filling is in the center; pecans have yet to be added. I used crumbled pecans for a thicker mixture. Pecan filling went in last.
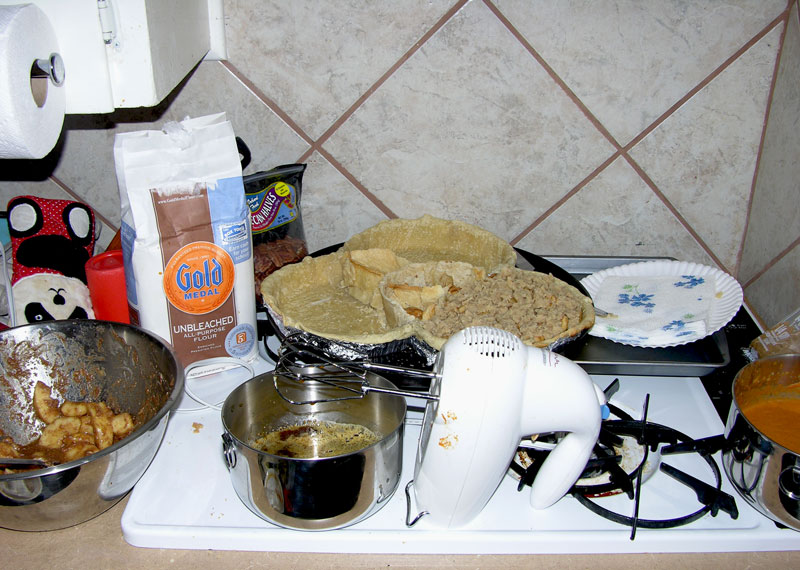 Use baking time to clean your workspace! (How else will you have room for photos at the end?)
Here’s how I did the fillings, in order:
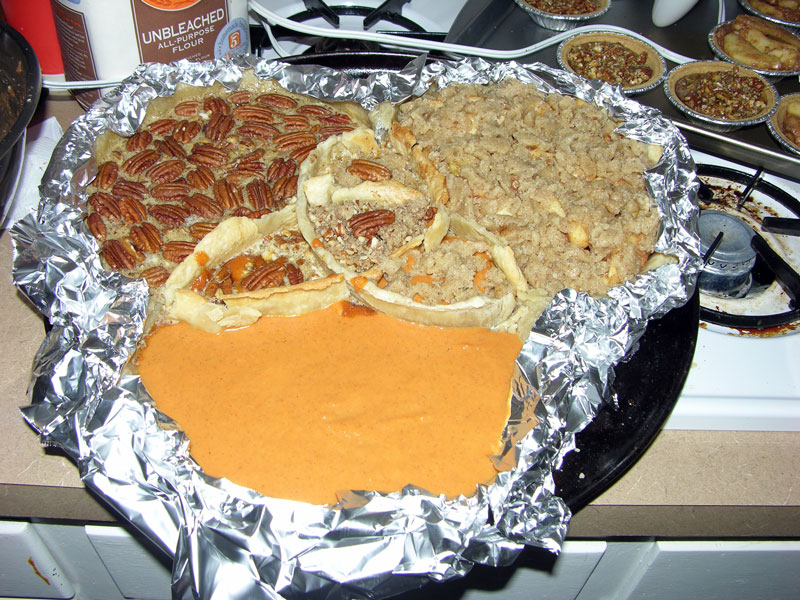
Ready to bake! Note the aluminum foil protecting the edges from over-baking. You can see some of the mini-pies I made using the excess filling.
 On its way into the oven!
The pie baked about an hour before a knife came out cleanly from the pumpkin filling. The mini pies, which I baked after the pie, took about 35 minutes without a cookie sheet. Oven heats vary, so check your pie at around 45 minutes, and your mini-pies at 25 minutes.
 A Venn pie-agram triumph! Or, the mother ship and her fleet. Whichever you prefer.
Have fun!
Originally posted on UXtraordinary.com.